- Authors

- Name
- Youngju Kim
- @fjvbn20031
引言
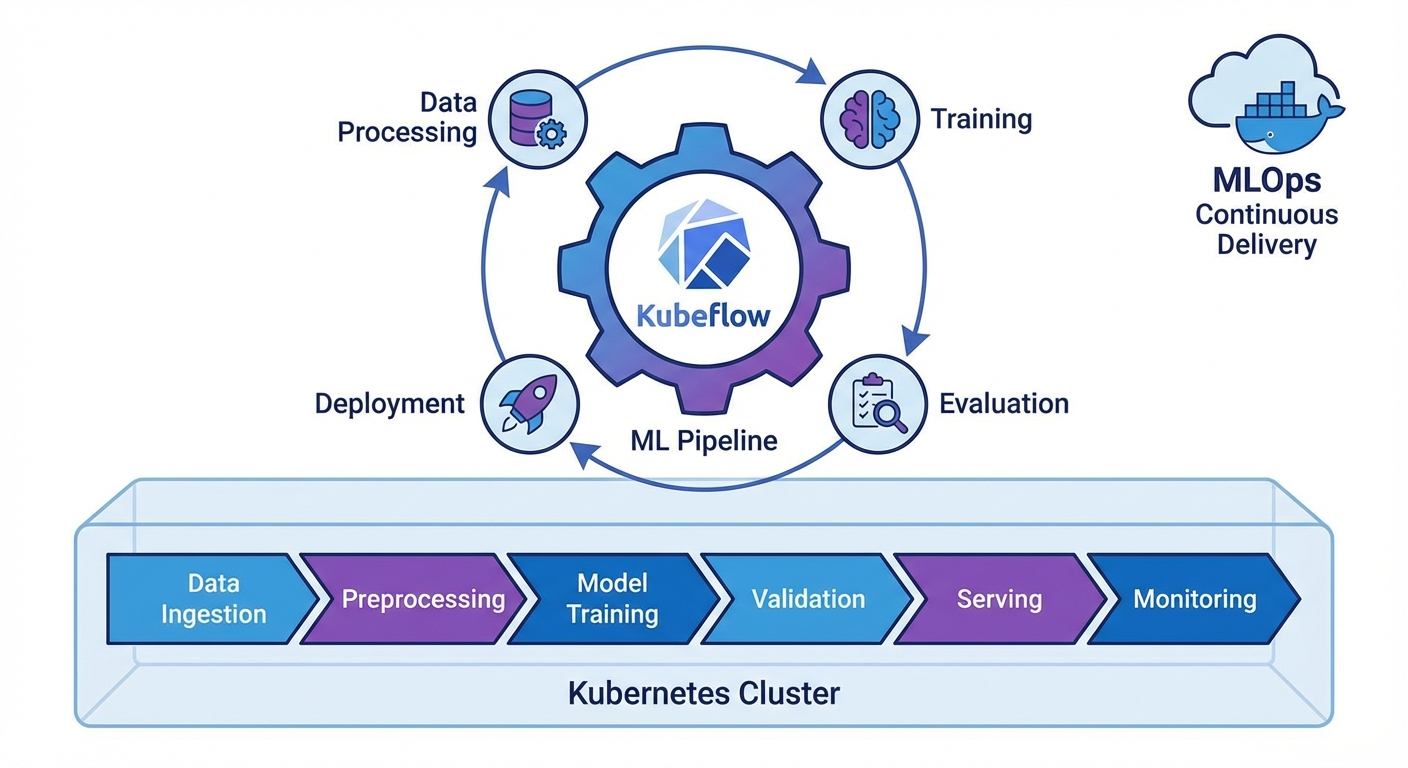
在把 ML 模型从实验搬到生产环境的过程中,可复现性、自动化、版本管理是必不可少的。Kubeflow Pipelines(KFP)v2 是一个在 Kubernetes 上定义和运行 ML 工作流的框架,仅凭 Python 装饰器就能组装出流水线。
本文将介绍 KFP v2 SDK 的核心功能,以及如何搭建实战流水线。
KFP v2 安装与基本概念
安装
pip install kfp==2.7.0

# 安装 Kubeflow Pipelines 后端(Kubernetes)
kubectl apply -k "github.com/kubeflow/pipelines/manifests/kustomize/env/platform-agnostic?ref=2.2.0"

# 端口转发
kubectl port-forward svc/ml-pipeline-ui -n kubeflow 8080:80
核心概念
# 1. Component:流水线中的一个工作单元(Python 函数)
# 2. Pipeline:由 Component 组成的 DAG(有向无环图)
# 3. Artifact:输入/输出数据(Dataset、Model、Metrics 等)
# 4. Run:流水线的一次执行
# 5. Experiment:多个 Run 的逻辑分组
定义组件
轻量级 Python 组件
from kfp import dsl
from kfp.dsl import (
    Dataset, Input, Output, Model, Metrics,
    ClassificationMetrics, component
)


@dsl.component(
    base_image="python:3.11-slim",
    packages_to_install=["pandas==2.1.4", "scikit-learn==1.4.0"]
)
def load_data(
    dataset_url: str,
    output_dataset: Output[Dataset]
):
    """数据加载组件"""
    import pandas as pd

    df = pd.read_csv(dataset_url)
    print(f"Loaded {len(df)} rows")

    # 保存到输出 artifact
    df.to_csv(output_dataset.path, index=False)
    output_dataset.metadata["num_rows"] = len(df)
    output_dataset.metadata["num_columns"] = len(df.columns)


@dsl.component(
    base_image="python:3.11-slim",
    packages_to_install=["pandas==2.1.4", "scikit-learn==1.4.0"]
)
def preprocess_data(
    input_dataset: Input[Dataset],
    train_dataset: Output[Dataset],
    test_dataset: Output[Dataset],
    test_size: float = 0.2
):
    """数据预处理与切分"""
    import pandas as pd
    from sklearn.model_selection import train_test_split

    df = pd.read_csv(input_dataset.path)

    # 预处理
    df = df.dropna()
    df = df.drop_duplicates()

    # 切分
    train_df, test_df = train_test_split(df, test_size=test_size, random_state=42)

    train_df.to_csv(train_dataset.path, index=False)
    test_df.to_csv(test_dataset.path, index=False)

    train_dataset.metadata["num_rows"] = len(train_df)
    test_dataset.metadata["num_rows"] = len(test_df)


@dsl.component(
    base_image="python:3.11-slim",
    packages_to_install=[
        "pandas==2.1.4", "scikit-learn==1.4.0",
        "joblib==1.3.2", "xgboost==2.0.3"
    ]
)
def train_model(
    train_dataset: Input[Dataset],
    model_output: Output[Model],
    metrics_output: Output[Metrics],
    n_estimators: int = 100,
    max_depth: int = 6,
    learning_rate: float = 0.1
):
    """模型训练"""
    import pandas as pd
    import joblib
    from xgboost import XGBClassifier
    from sklearn.model_selection import cross_val_score

    df = pd.read_csv(train_dataset.path)
    X = df.drop("target", axis=1)
    y = df["target"]

    # 训练
    model = XGBClassifier(
        n_estimators=n_estimators,
        max_depth=max_depth,
        learning_rate=learning_rate,
        random_state=42
    )
    model.fit(X, y)

    # 交叉验证
    cv_scores = cross_val_score(model, X, y, cv=5, scoring="accuracy")

    # 保存模型
    joblib.dump(model, model_output.path)
    model_output.metadata["framework"] = "xgboost"
    model_output.metadata["n_estimators"] = n_estimators

    # 记录指标
    metrics_output.log_metric("cv_accuracy_mean", float(cv_scores.mean()))
    metrics_output.log_metric("cv_accuracy_std", float(cv_scores.std()))
    metrics_output.log_metric("n_estimators", n_estimators)


@dsl.component(
    base_image="python:3.11-slim",
    packages_to_install=[
        "pandas==2.1.4", "scikit-learn==1.4.0",
        "joblib==1.3.2", "xgboost==2.0.3"
    ]
)
def evaluate_model(
    test_dataset: Input[Dataset],
    model_input: Input[Model],
    metrics_output: Output[ClassificationMetrics],
    eval_metrics: Output[Metrics]
) -> float:
    """模型评估"""
    import pandas as pd
    import joblib
    from sklearn.metrics import accuracy_score, classification_report

    df = pd.read_csv(test_dataset.path)
    X = df.drop("target", axis=1)
    y = df["target"]

    model = joblib.load(model_input.path)
    y_pred = model.predict(X)
    y_prob = model.predict_proba(X)

    accuracy = accuracy_score(y, y_pred)

    # 分类指标(混淆矩阵可视化)
    metrics_output.log_confusion_matrix(
        categories=["Class 0", "Class 1"],
        matrix=[[int(sum((y == 0) & (y_pred == 0))), int(sum((y == 0) & (y_pred == 1)))],
                [int(sum((y == 1) & (y_pred == 0))), int(sum((y == 1) & (y_pred == 1)))]]
    )

    eval_metrics.log_metric("test_accuracy", accuracy)

    return accuracy
自定义 Docker 镜像组件
@dsl.component(
    base_image="pytorch/pytorch:2.1.0-cuda12.1-cudnn8-runtime",
    packages_to_install=["transformers==4.37.0", "datasets==2.16.0"]
)
def finetune_llm(
    model_name: str,
    train_dataset: Input[Dataset],
    output_model: Output[Model],
    epochs: int = 3,
    batch_size: int = 8
):
    """LLM 微调(使用 GPU)"""
    from transformers import AutoModelForSequenceClassification, Trainer
    # ... 训练代码
    pass
编写流水线
基本流水线
@dsl.pipeline(
    name="ML Training Pipeline",
    description="数据加载 → 预处理 → 训练 → 评估流水线"
)
def ml_training_pipeline(
    dataset_url: str = "https://example.com/data.csv",
    test_size: float = 0.2,
    n_estimators: int = 100,
    max_depth: int = 6,
    learning_rate: float = 0.1,
    accuracy_threshold: float = 0.85
):
    # Step 1: 加载数据
    load_task = load_data(dataset_url=dataset_url)

    # Step 2: 预处理(load_task 完成后执行)
    preprocess_task = preprocess_data(
        input_dataset=load_task.outputs["output_dataset"],
        test_size=test_size
    )

    # Step 3: 模型训练
    train_task = train_model(
        train_dataset=preprocess_task.outputs["train_dataset"],
        n_estimators=n_estimators,
        max_depth=max_depth,
        learning_rate=learning_rate
    )
    # 设置资源限制
    train_task.set_cpu_limit("4")
    train_task.set_memory_limit("8Gi")

    # Step 4: 评估
    eval_task = evaluate_model(
        test_dataset=preprocess_task.outputs["test_dataset"],
        model_input=train_task.outputs["model_output"]
    )

    # Step 5: 条件部署
    with dsl.If(eval_task.output >= accuracy_threshold):
        deploy_task = deploy_model(
            model_input=train_task.outputs["model_output"],
            accuracy=eval_task.output
        )


@dsl.component(base_image="python:3.11-slim")
def deploy_model(
    model_input: Input[Model],
    accuracy: float
):
    """模型部署(满足条件时)"""
    print(f"Deploying model with accuracy: {accuracy:.4f}")
    print(f"Model path: {model_input.path}")
    # 实际部署逻辑(K8s Serving、BentoML 等)
编译并运行流水线
from kfp import compiler
from kfp.client import Client

# 1. 编译为 YAML
compiler.Compiler().compile(
    pipeline_func=ml_training_pipeline,
    package_path="ml_pipeline.yaml"
)

# 2. 提交到 KFP 服务器
client = Client(host="http://localhost:8080")

# 创建 Experiment
experiment = client.create_experiment(name="ml-experiments")

# 执行 Run
run = client.create_run_from_pipeline_func(
    ml_training_pipeline,
    experiment_name="ml-experiments",
    run_name="training-run-001",
    arguments={
        "dataset_url": "gs://my-bucket/data.csv",
        "n_estimators": 200,
        "max_depth": 8,
        "accuracy_threshold": 0.90
    }
)

print(f"Run ID: {run.run_id}")
print(f"Run URL: http://localhost:8080/#/runs/details/{run.run_id}")
定期执行(Recurring Run)
# 每天凌晨 2 点执行
client.create_recurring_run(
    experiment_id=experiment.experiment_id,
    job_name="daily-retraining",
    pipeline_func=ml_training_pipeline,
    cron_expression="0 2 * * *",
    max_concurrency=1,
    arguments={
        "dataset_url": "gs://my-bucket/latest-data.csv",
        "accuracy_threshold": 0.85
    }
)
高级模式
并行执行(ParallelFor)
@dsl.pipeline(name="Hyperparameter Search")
def hp_search_pipeline():
    # 定义超参数组合
    hp_configs = [
        {"n_estimators": 100, "max_depth": 4, "lr": 0.1},
        {"n_estimators": 200, "max_depth": 6, "lr": 0.05},
        {"n_estimators": 300, "max_depth": 8, "lr": 0.01},
    ]

    # 并行训练
    with dsl.ParallelFor(hp_configs) as config:
        train_task = train_model(
            train_dataset=load_task.outputs["output_dataset"],
            n_estimators=config.n_estimators,
            max_depth=config.max_depth,
            learning_rate=config.lr
        )
缓存
# 在组件级别禁用缓存
load_task = load_data(dataset_url=dataset_url)
load_task.set_caching_options(False)  # 始终重新执行

# 在流水线级别设置缓存
run = client.create_run_from_pipeline_func(
    ml_training_pipeline,
    enable_caching=True  # 输入相同时使用缓存
)
挂载卷
@dsl.component(base_image="python:3.11-slim")
def process_large_data(output_data: Output[Dataset]):
    """处理大规模数据"""
    pass

# 挂载 PVC
process_task = process_large_data()
process_task.add_pvolumes({
    "/mnt/data": dsl.PipelineVolume(pvc="data-pvc")
})
CI/CD 集成
GitHub Actions + KFP
# .github/workflows/ml-pipeline.yml
name: ML Pipeline CI/CD

on:
  push:
    branches: [main]
    paths:
      - 'pipelines/**'
      - 'components/**'

jobs:
  deploy-pipeline:
    runs-on: ubuntu-latest
    steps:
      - uses: actions/checkout@v4

      - name: Set up Python
        uses: actions/setup-python@v5
        with:
          python-version: '3.11'

      - name: Install dependencies
        run: pip install kfp==2.7.0

      - name: Compile pipeline
        run: python pipelines/compile.py

      - name: Upload and run pipeline
        env:
          KFP_HOST: ${{ secrets.KFP_HOST }}
        run: |
          python -c "
          from kfp.client import Client
          client = Client(host='$KFP_HOST')
          client.upload_pipeline(
            pipeline_package_path='ml_pipeline.yaml',
            pipeline_name='ml-training-v2',
            description='Automated ML training pipeline'
          )
          "
结语
Kubeflow Pipelines v2 核心要点:
- @dsl.component:将 Python 函数转换为容器化的组件
- @dsl.pipeline:把组件连接成 DAG
- Artifact 系统:用 Dataset、Model、Metrics 类型管理输入/输出
- 条件/循环:用 dsl.If、dsl.ParallelFor 构建动态流水线
- 缓存:相同输入时跳过重新执行,节省成本
测验(6题)
Q1. 在 KFP v2 中,用于定义组件的装饰器是什么? @dsl.component
Q2. Output[Dataset] 和 Output[Model] 有什么区别? 用类型提示区分 Artifact 的种类。Dataset 是数据 Artifact,Model 是训练完成的模型 Artifact。
Q3. 如何在流水线中实现条件执行? 使用 dsl.If 上下文管理器(例如 with dsl.If(accuracy >= threshold))
Q4. 在启用缓存的状态下,用相同的输入执行会怎样? 复用之前的执行结果,跳过该组件
Q5. ParallelFor 的用途是什么? 用不同的参数并行执行同一个组件(例如超参数搜索)
Q6. 从 KFP v1 迁移到 v2 时,最大的变化是什么? 用 @dsl.component 装饰器取代 ContainerOp,并引入了 Artifact 类型系统
测验
Q1:《Kubeflow Pipelines v2 实战指南 — 用 KFP SDK 构建 ML 流水线》一文的主要内容是什么?
一份使用 Kubeflow Pipelines v2 的 KFP SDK 构建 ML 流水线的实战指南。以代码为中心,涵盖组件定义、流水线编写、Artifact 管理直至 Kubernetes 部署。
Q2:KFP v2 安装与基本概念部分的关键步骤有哪些?
安装 核心概念
Q3:请说明「定义组件」部分的核心概念。
轻量级 Python 组件 自定义 Docker 镜像组件
Q4:编写流水线部分的关键要点有哪些?
基本流水线 编译并运行流水线 定期执行(Recurring Run)
Q5:高级模式是如何运作的?
并行执行(ParallelFor) 缓存 挂载卷