- Authors
- Name
Overview
Hadoopは大容量のデータを保管することができます。そのため、これらのデータを安全に保管するためにはKerberosを適用する必要があります。 今回の記事では、Kerberos適用に必要なKDCサーバーの構築過程を紹介します。詳細についてはubuntu-MIT-kerberos-settingドキュメントを参照してください。
krb5-kdc、krb5-admin-server インストール
aptコマンドでkrb5-kdcとkrb5-admin-serverをインストールします。
sudo apt install krb5-kdc krb5-admin-server
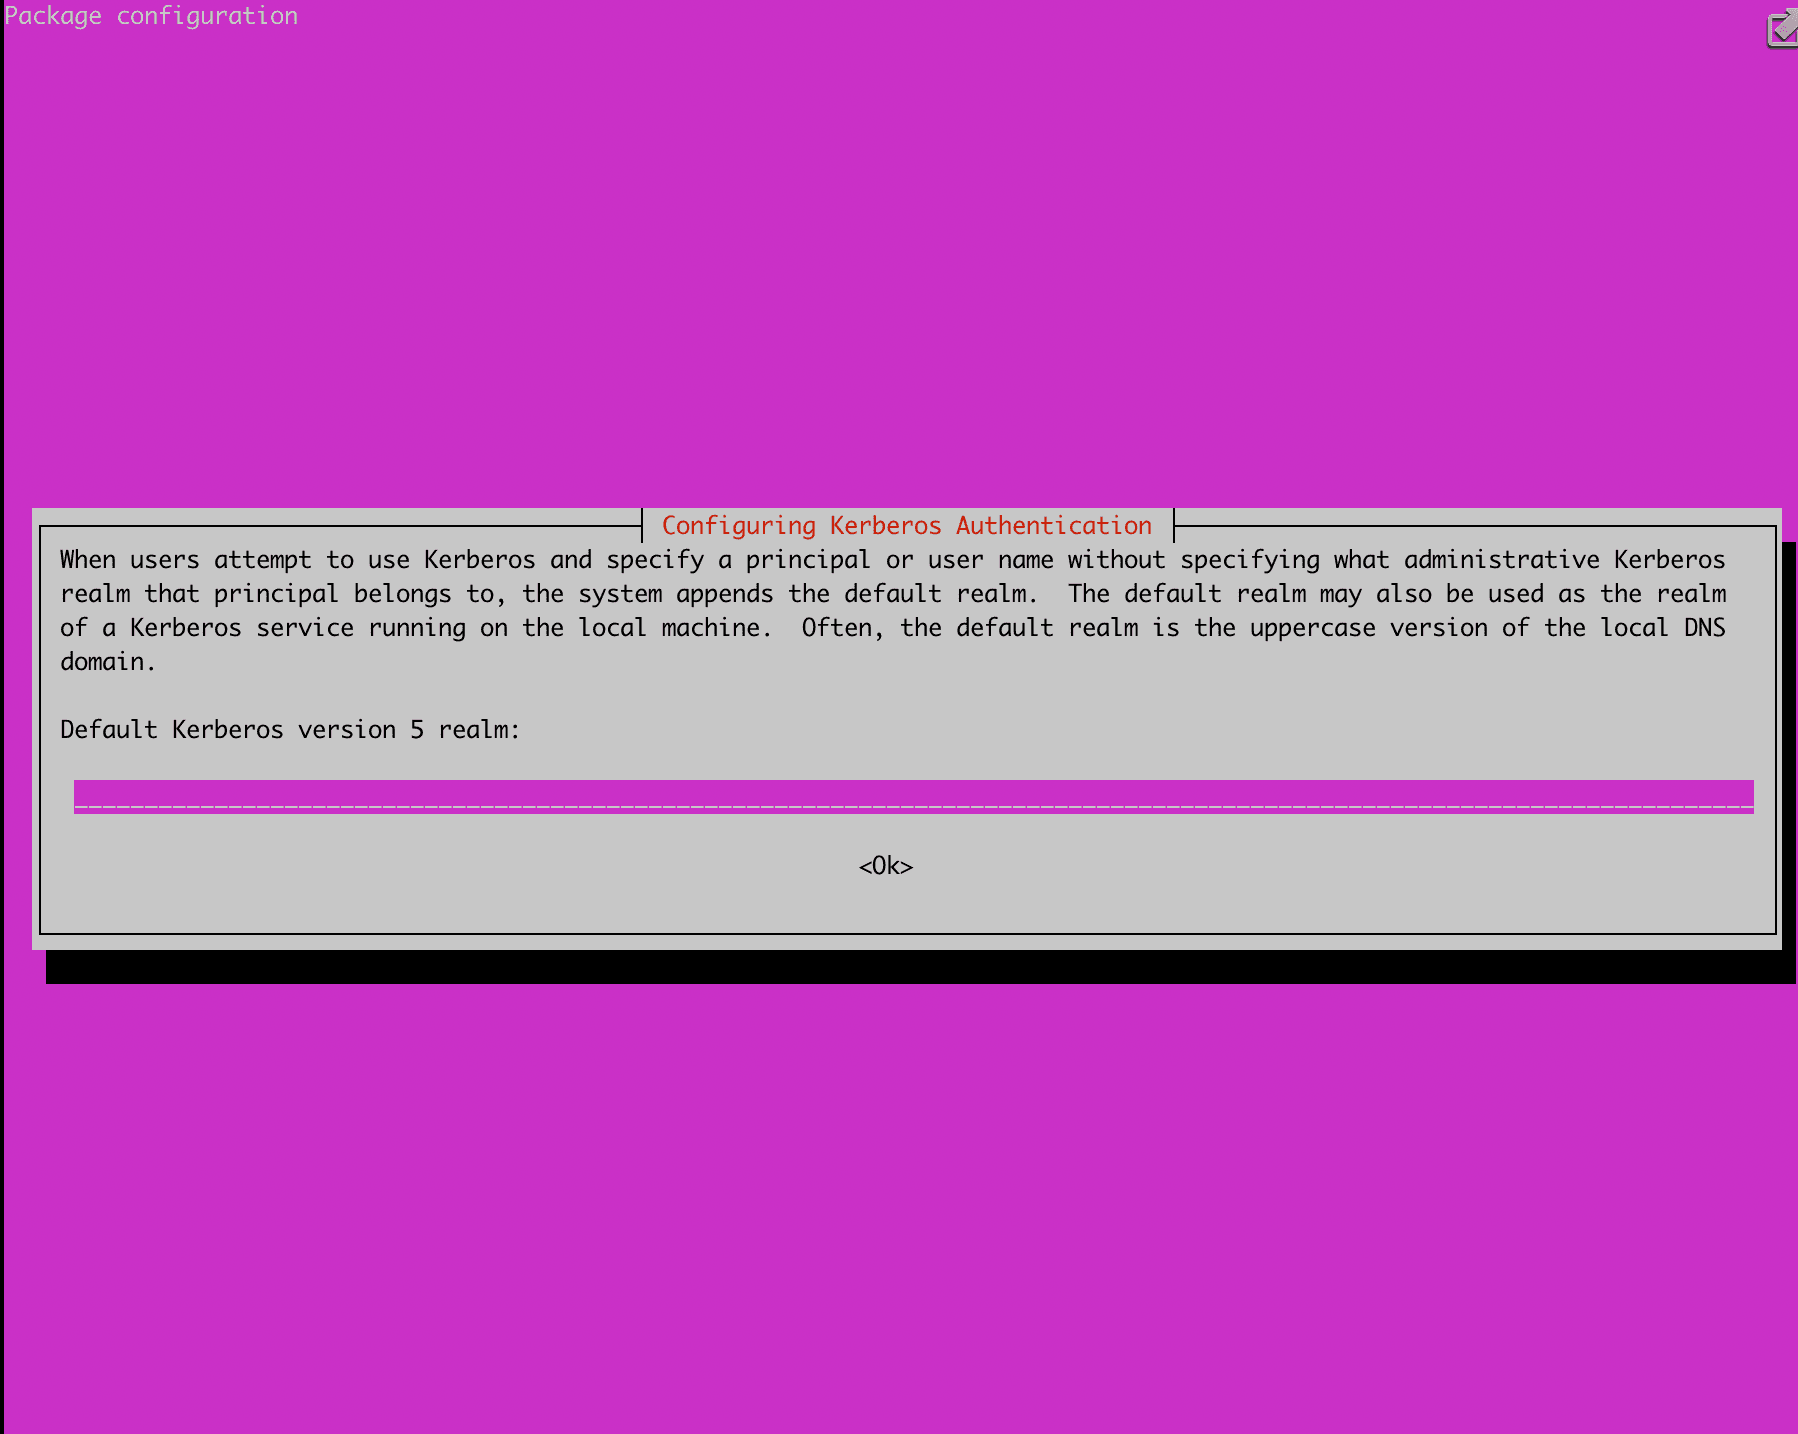
インストール中に以下のようにrealmを入力する画面が表示されますので、希望するrealmを入力します。私はUBUNTU.YJ.COMに設定しました。
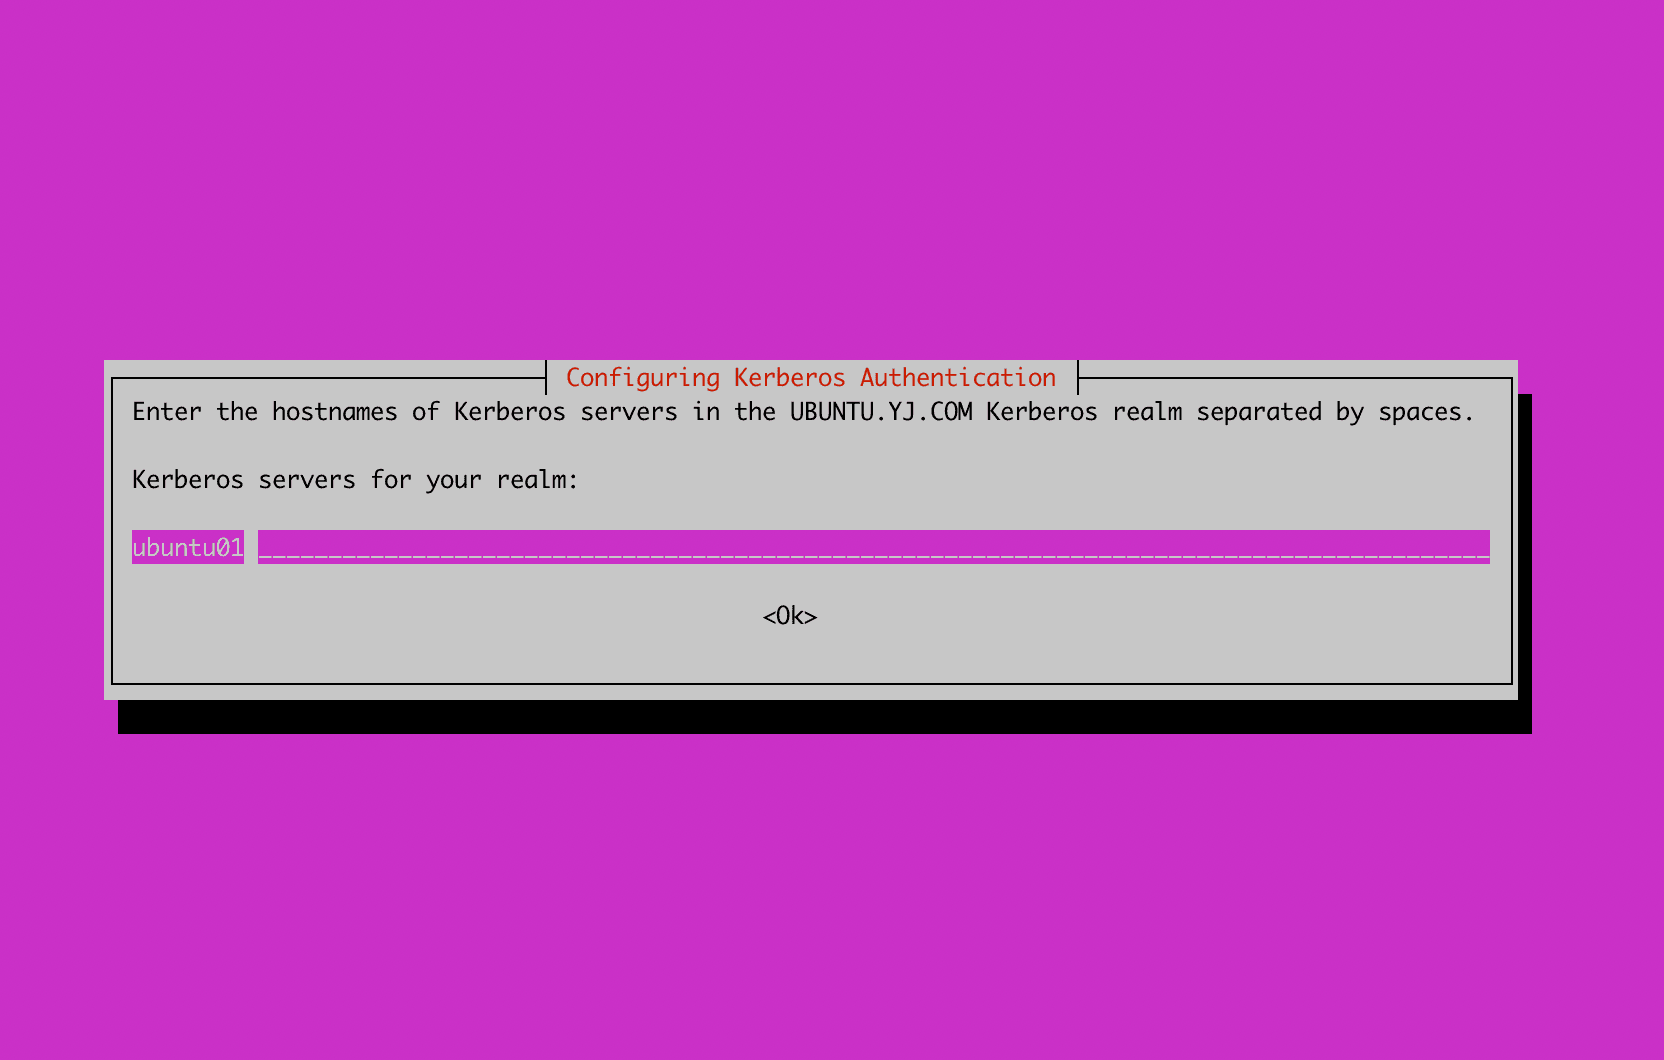
Kerberosサーバーがインストールされるhostnameを入力する画面が表示されますので、以下のようにサーバーのhostnameを入力します。
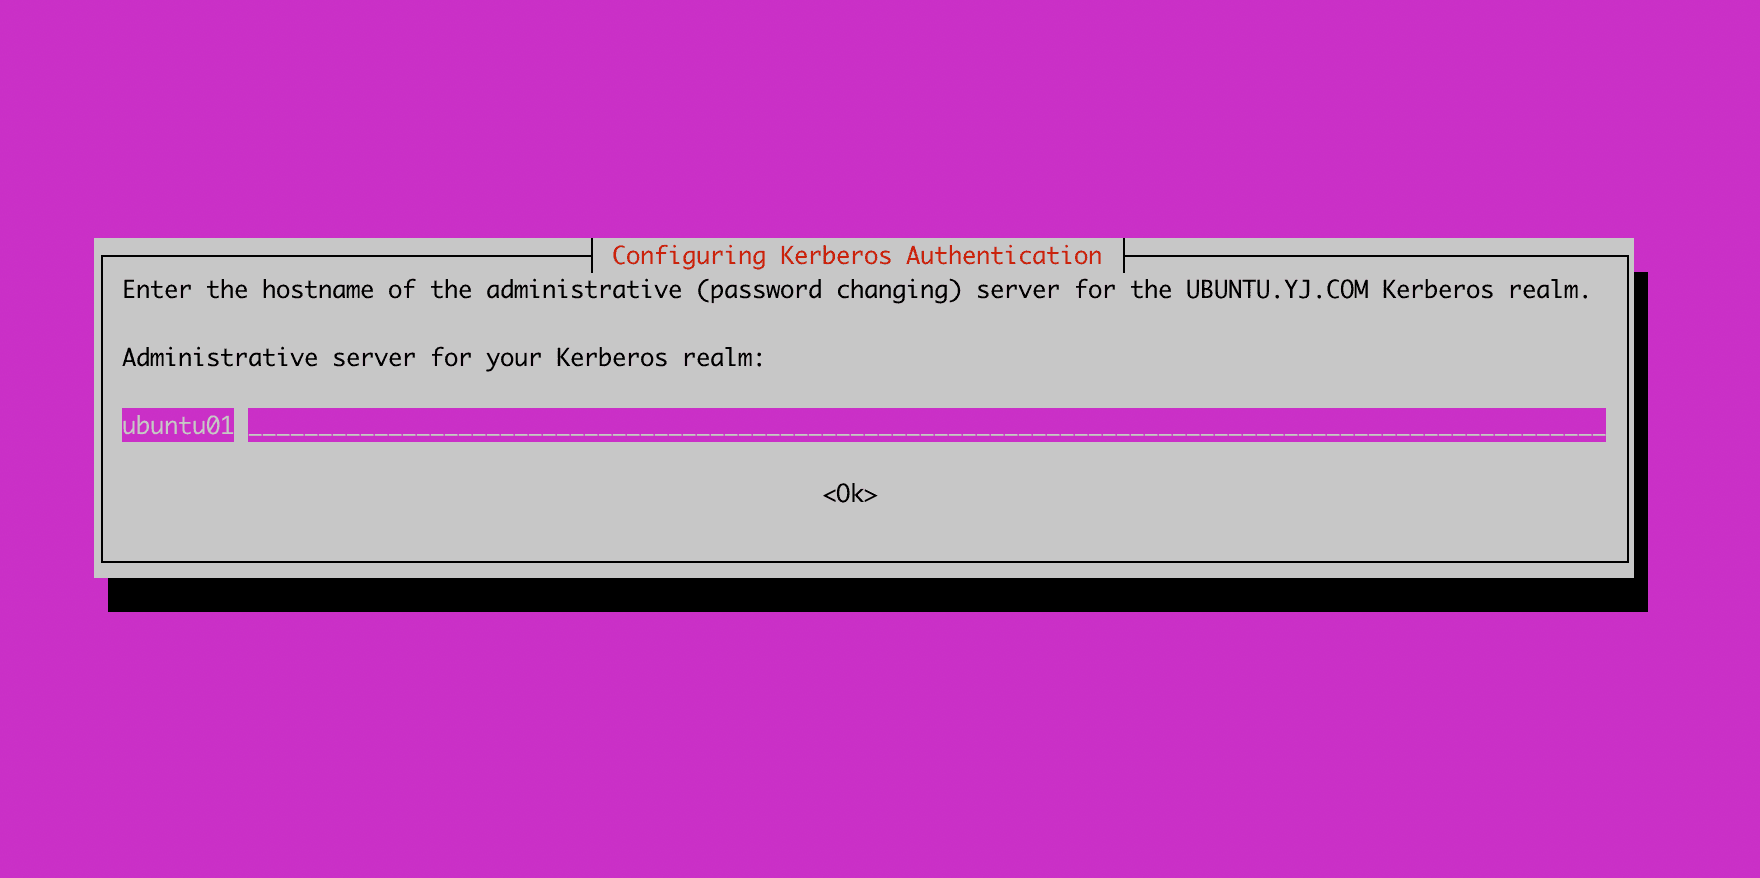
続いてadminサーバーのhostnameを入力します。私の場合、adminサーバーもKerberosサーバーと同じサーバーにインストールするため、同じホスト名を入力しました。
インストールが完了したら、krb5_newrealmコマンドでデータベースを作成します。この過程でdatabase masterのパスワードを設定します。
root@ubuntu01:~# sudo krb5_newrealm
This script should be run on the master KDC/admin server to initialize
a Kerberos realm.  It will ask you to type in a master key password.
This password will be used to generate a key that is stored in
/etc/krb5kdc/stash.  You should try to remember this password, but it
is much more important that it be a strong password than that it be
remembered.  However, if you lose the password and /etc/krb5kdc/stash,
you cannot decrypt your Kerberos database.
Loading random data
Initializing database '/var/lib/krb5kdc/principal' for realm 'UBUNTU.YJ.COM',
master key name 'K/M@UBUNTU.YJ.COM'
You will be prompted for the database Master Password.
It is important that you NOT FORGET this password.
Enter KDC database master key:
Re-enter KDC database master key to verify:
Now that your realm is set up you may wish to create an administrative
principal using the addprinc subcommand of the kadmin.local program.
Then, this principal can be added to /etc/krb5kdc/kadm5.acl so that
you can use the kadmin program on other computers.  Kerberos admin
principals usually belong to a single user and end in /admin.  For
example, if jruser is a Kerberos administrator, then in addition to
the normal jruser principal, a jruser/admin principal should be
created.

Don't forget to set up DNS information so your clients can find your
KDC and admin servers.  Doing so is documented in the administration
guide.
kadmin.local 実行
kadmin.localコマンドを実行すると、realmとKDCに属するprincipalを管理できるプログラムが起動します。listprincを実行すると、現在登録されているprincipalを確認できます。
root@ubuntu01:~# kadmin.local
Authenticating as principal youngjukim/admin@UBUNTU.YJ.COM with password.
kadmin.local:  listprincs
K/M@UBUNTU.YJ.COM
kadmin/admin@UBUNTU.YJ.COM
kadmin/changepw@UBUNTU.YJ.COM
krbtgt/UBUNTU.YJ.COM@UBUNTU.YJ.COM
kadmin.localで実行できるコマンド
kadmin.local:  ?
Available kadmin.local requests:

add_principal, addprinc, ank
                         Add principal
delete_principal, delprinc
                         Delete principal
modify_principal, modprinc
                         Modify principal
rename_principal, renprinc
                         Rename principal
change_password, cpw     Change password
get_principal, getprinc  Get principal
list_principals, listprincs, get_principals, getprincs
                         List principals
add_policy, addpol       Add policy
modify_policy, modpol    Modify policy
delete_policy, delpol    Delete policy
get_policy, getpol       Get policy
list_policies, listpols, get_policies, getpols
                         List policies
get_privs, getprivs      Get privileges
ktadd, xst               Add entry(s) to a keytab
ktremove, ktrem          Remove entry(s) from a keytab
lock                     Lock database exclusively (use with extreme caution!)
unlock                   Release exclusive database lock
purgekeys                Purge previously retained old keys from a principal
get_strings, getstrs     Show string attributes on a principal
set_string, setstr       Set a string attribute on a principal
del_string, delstr       Delete a string attribute on a principal
list_requests, lr, ?     List available requests.
KDC admin ACL登録
youngjukim/admin principal以外に他のadmin principalを登録したい場合があります。その場合は以下のように*/admin *部分のコメントを解除します。その後、krb5-admin-serverを再起動すると、*/adminで作成されるprincipalにadmin権限が付与されるように設定されます。
# This file Is the access control list for krb5 administration.
# When this file is edited run service krb5-admin-server restart to activate
# One common way to set up Kerberos administration is to allow any principal
# ending in /admin  is given full administrative rights.
# To enable this, uncomment the following line:
*/admin *
admin ACLを反映するためにkrb5-admin-serverを再起動します。
root@ubuntu01:~# service krb5-admin-server status
● krb5-admin-server.service - Kerberos 5 Admin Server
     Loaded: loaded (/lib/systemd/system/krb5-admin-server.service; enabled; vendor preset: enabled)
     Active: active (running) since Sun 2022-11-20 16:00:19 UTC; 11min ago
root@ubuntu01:~# service krb5-admin-server restart
以下のファイルでKDCサーバーのport、ticket lifetime、ログの場所、データベースの場所、encryption typeなどを変更できます。
[kdcdefaults]
    kdc_ports = 750,88

[realms]
    UBUNTU.YJ.COM = {
        database_name = /var/lib/krb5kdc/principal
        admin_keytab = FILE:/etc/krb5kdc/kadm5.keytab
        acl_file = /etc/krb5kdc/kadm5.acl
        key_stash_file = /etc/krb5kdc/stash
        kdc_ports = 750,88
        max_life = 10h 0m 0s
        max_renewable_life = 7d 0h 0m 0s
        master_key_type = des3-hmac-sha1
        #supported_enctypes = aes256-cts:normal aes128-cts:normal
        default_principal_flags = +preauth
    }
kinit テスト
ClientがKDCにアクセスしてticketを発行してもらうには、以下の準備が必要です。詳細は(krb5-client)[https://plugins.miniorange.com/steps-to-setup-kerberos-on-ubuntu-rhel-centos]を参照してください。
- KDCサーバー側で、アクセスしたいprincipalがデータベースに追加されている必要があります。
- ClientにKDCアクセス用のライブラリがインストールされている必要があります。(krb5-user or krb5-workstation)
- Clientでkinit principalを実行します。この時、Clientは該当principalのkeytabを持っているか、パスワードを知っている必要があります。
1. kadmin.localでprincipalを作成する(パスワード方式)
root@ubuntu01:~# kadmin.local
Authenticating as principal youngjukim/admin@UBUNTU.YJ.COM with password.
kadmin.local:  addprinc test-user
No policy specified for test-user@UBUNTU.YJ.COM; defaulting to no policy
Enter password for principal "test-user@UBUNTU.YJ.COM":
Re-enter password for principal "test-user@UBUNTU.YJ.COM":
Principal "test-user@UBUNTU.YJ.COM" created.
2. ClientへのKDCアクセス用ライブラリのインストール + /etc/krb5.confの修正
sudo apt install krb5-userコマンドを入力するとインストールが開始されます。
root@ubuntu02:~# cat /etc/krb5.conf
[libdefaults]
	default_realm = UBUNTU.YJ.COM

# The following krb5.conf variables are only for MIT Kerberos.
	kdc_timesync = 1
	ccache_type = 4
	forwardable = true
	proxiable = true

# The following encryption type specification will be used by MIT Kerberos
# if uncommented.  In general, the defaults in the MIT Kerberos code are
# correct and overriding these specifications only serves to disable new
# encryption types as they are added, creating interoperability problems.
#
# The only time when you might need to uncomment these lines and change
# the enctypes is if you have local software that will break on ticket
# caches containing ticket encryption types it doesn't know about (such as
# old versions of Sun Java).

#	default_tgs_enctypes = des3-hmac-sha1
#	default_tkt_enctypes = des3-hmac-sha1
#	permitted_enctypes = des3-hmac-sha1

# The following libdefaults parameters are only for Heimdal Kerberos.
	fcc-mit-ticketflags = true

[realms]
	UBUNTU.YJ.COM = {
		kdc = ubuntu01
		admin_server = ubuntu01
	}

[domain_realm]
3. kinit principalの実行
kinit principalを実行します。keytabがある場合は、-ktオプションでkeytabのパスを指定することもできます。klistを入力すると、発行されたKerberos ticketの情報を確認できます。
root@ubuntu02:~# kinit  -V test-user
Using default cache: /tmp/krb5cc_0
Using principal: test-user@UBUNTU.YJ.COM
Password for test-user@UBUNTU.YJ.COM:
Authenticated to Kerberos v5
root@ubuntu02:~# klist
Ticket cache: FILE:/tmp/krb5cc_0
Default principal: test-user@UBUNTU.YJ.COM

Valid starting       Expires              Service principal
11/20/2022 16:34:17  11/21/2022 02:34:17  krbtgt/UBUNTU.YJ.COM@UBUNTU.YJ.COM
	renew until 11/21/2022 16:33:33