들어가며
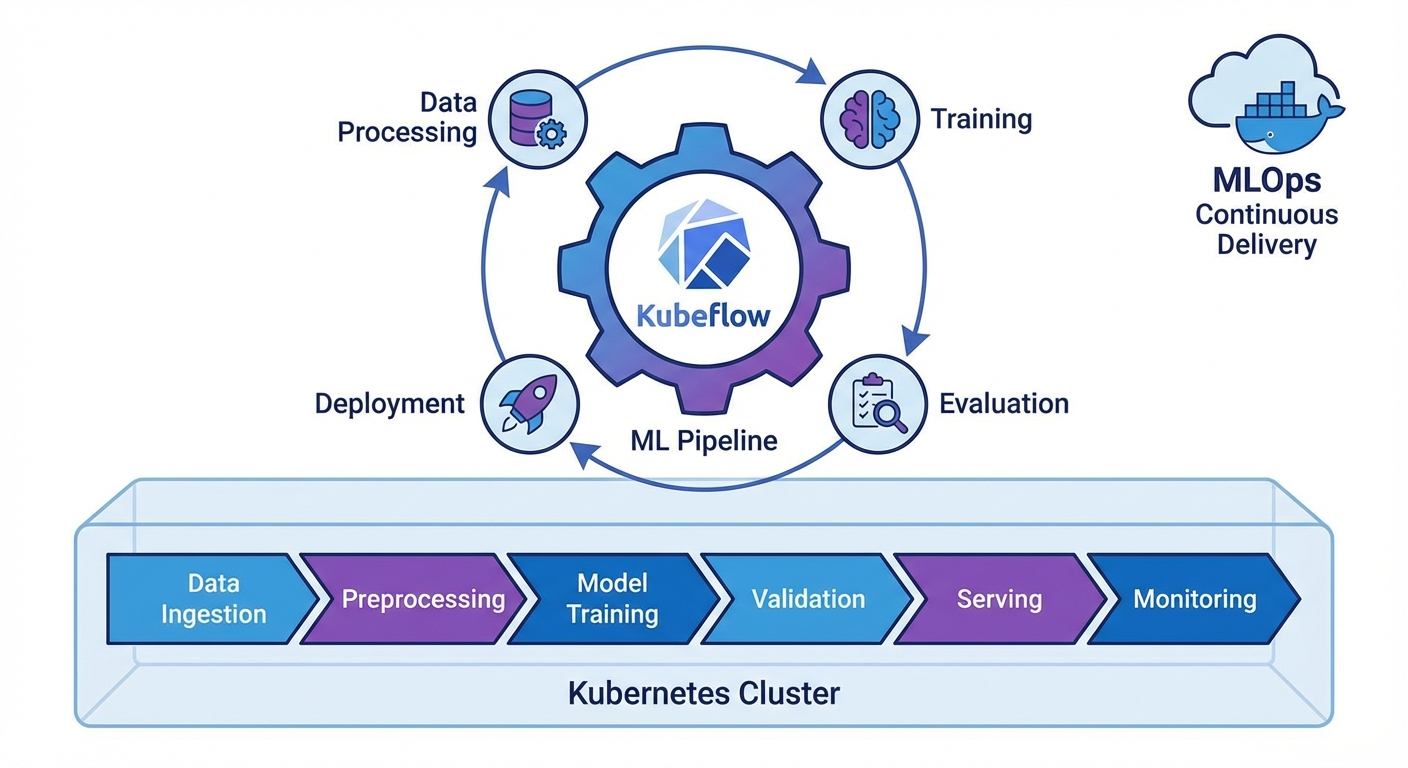
ML 모델을 실험에서 프로덕션으로 옮기는 과정에서 재현성, 자동화, 버전 관리는 필수입니다. Kubeflow Pipelines(KFP) v2는 Kubernetes 위에서 ML 워크플로를 정의하고 실행하는 프레임워크로, 파이썬 데코레이터만으로 파이프라인을 구성할 수 있습니다.
이 글에서는 KFP v2 SDK의 핵심 기능과 실전 파이프라인 구축을 다룹니다.
KFP v2 설치 및 기본 개념
설치
pip install kfp==2.7.0

# Kubeflow Pipelines 백엔드 설치 (Kubernetes)
kubectl apply -k "github.com/kubeflow/pipelines/manifests/kustomize/env/platform-agnostic?ref=2.2.0"

# 포트포워딩
kubectl port-forward svc/ml-pipeline-ui -n kubeflow 8080:80
핵심 개념
# 1. Component: 파이프라인의 단위 작업 (Python 함수)
# 2. Pipeline: Component들의 DAG(방향 비순환 그래프)
# 3. Artifact: 입출력 데이터 (Dataset, Model, Metrics 등)
# 4. Run: 파이프라인의 한 번 실행
# 5. Experiment: Run들의 논리적 그룹
컴포넌트 정의
Lightweight Python Component
from kfp import dsl
from kfp.dsl import (
    Dataset, Input, Output, Model, Metrics,
    ClassificationMetrics, component
)


@dsl.component(
    base_image="python:3.11-slim",
    packages_to_install=["pandas==2.1.4", "scikit-learn==1.4.0"]
)
def load_data(
    dataset_url: str,
    output_dataset: Output[Dataset]
):
    """데이터 로드 컴포넌트"""
    import pandas as pd

    df = pd.read_csv(dataset_url)
    print(f"Loaded {len(df)} rows")

    # Output artifact에 저장
    df.to_csv(output_dataset.path, index=False)
    output_dataset.metadata["num_rows"] = len(df)
    output_dataset.metadata["num_columns"] = len(df.columns)


@dsl.component(
    base_image="python:3.11-slim",
    packages_to_install=["pandas==2.1.4", "scikit-learn==1.4.0"]
)
def preprocess_data(
    input_dataset: Input[Dataset],
    train_dataset: Output[Dataset],
    test_dataset: Output[Dataset],
    test_size: float = 0.2
):
    """데이터 전처리 및 분할"""
    import pandas as pd
    from sklearn.model_selection import train_test_split

    df = pd.read_csv(input_dataset.path)

    # 전처리
    df = df.dropna()
    df = df.drop_duplicates()

    # 분할
    train_df, test_df = train_test_split(df, test_size=test_size, random_state=42)

    train_df.to_csv(train_dataset.path, index=False)
    test_df.to_csv(test_dataset.path, index=False)

    train_dataset.metadata["num_rows"] = len(train_df)
    test_dataset.metadata["num_rows"] = len(test_df)


@dsl.component(
    base_image="python:3.11-slim",
    packages_to_install=[
        "pandas==2.1.4", "scikit-learn==1.4.0",
        "joblib==1.3.2", "xgboost==2.0.3"
    ]
)
def train_model(
    train_dataset: Input[Dataset],
    model_output: Output[Model],
    metrics_output: Output[Metrics],
    n_estimators: int = 100,
    max_depth: int = 6,
    learning_rate: float = 0.1
):
    """모델 학습"""
    import pandas as pd
    import joblib
    from xgboost import XGBClassifier
    from sklearn.model_selection import cross_val_score

    df = pd.read_csv(train_dataset.path)
    X = df.drop("target", axis=1)
    y = df["target"]

    # 학습
    model = XGBClassifier(
        n_estimators=n_estimators,
        max_depth=max_depth,
        learning_rate=learning_rate,
        random_state=42
    )
    model.fit(X, y)

    # 교차 검증
    cv_scores = cross_val_score(model, X, y, cv=5, scoring="accuracy")

    # 모델 저장
    joblib.dump(model, model_output.path)
    model_output.metadata["framework"] = "xgboost"
    model_output.metadata["n_estimators"] = n_estimators

    # 메트릭 기록
    metrics_output.log_metric("cv_accuracy_mean", float(cv_scores.mean()))
    metrics_output.log_metric("cv_accuracy_std", float(cv_scores.std()))
    metrics_output.log_metric("n_estimators", n_estimators)


@dsl.component(
    base_image="python:3.11-slim",
    packages_to_install=[
        "pandas==2.1.4", "scikit-learn==1.4.0",
        "joblib==1.3.2", "xgboost==2.0.3"
    ]
)
def evaluate_model(
    test_dataset: Input[Dataset],
    model_input: Input[Model],
    metrics_output: Output[ClassificationMetrics],
    eval_metrics: Output[Metrics]
) -> float:
    """모델 평가"""
    import pandas as pd
    import joblib
    from sklearn.metrics import accuracy_score, classification_report

    df = pd.read_csv(test_dataset.path)
    X = df.drop("target", axis=1)
    y = df["target"]

    model = joblib.load(model_input.path)
    y_pred = model.predict(X)
    y_prob = model.predict_proba(X)

    accuracy = accuracy_score(y, y_pred)

    # Classification metrics (Confusion Matrix 시각화)
    metrics_output.log_confusion_matrix(
        categories=["Class 0", "Class 1"],
        matrix=[[int(sum((y == 0) & (y_pred == 0))), int(sum((y == 0) & (y_pred == 1)))],
                [int(sum((y == 1) & (y_pred == 0))), int(sum((y == 1) & (y_pred == 1)))]]
    )

    eval_metrics.log_metric("test_accuracy", accuracy)

    return accuracy
커스텀 Docker 이미지 컴포넌트
@dsl.component(
    base_image="pytorch/pytorch:2.1.0-cuda12.1-cudnn8-runtime",
    packages_to_install=["transformers==4.37.0", "datasets==2.16.0"]
)
def finetune_llm(
    model_name: str,
    train_dataset: Input[Dataset],
    output_model: Output[Model],
    epochs: int = 3,
    batch_size: int = 8
):
    """LLM 파인튜닝 (GPU 사용)"""
    from transformers import AutoModelForSequenceClassification, Trainer
    # ... 학습 코드
    pass
파이프라인 작성
기본 파이프라인
@dsl.pipeline(
    name="ML Training Pipeline",
    description="데이터 로드 → 전처리 → 학습 → 평가 파이프라인"
)
def ml_training_pipeline(
    dataset_url: str = "https://example.com/data.csv",
    test_size: float = 0.2,
    n_estimators: int = 100,
    max_depth: int = 6,
    learning_rate: float = 0.1,
    accuracy_threshold: float = 0.85
):
    # Step 1: 데이터 로드
    load_task = load_data(dataset_url=dataset_url)

    # Step 2: 전처리 (load_task 완료 후 실행)
    preprocess_task = preprocess_data(
        input_dataset=load_task.outputs["output_dataset"],
        test_size=test_size
    )

    # Step 3: 모델 학습
    train_task = train_model(
        train_dataset=preprocess_task.outputs["train_dataset"],
        n_estimators=n_estimators,
        max_depth=max_depth,
        learning_rate=learning_rate
    )
    # GPU 리소스 설정
    train_task.set_cpu_limit("4")
    train_task.set_memory_limit("8Gi")

    # Step 4: 평가
    eval_task = evaluate_model(
        test_dataset=preprocess_task.outputs["test_dataset"],
        model_input=train_task.outputs["model_output"]
    )

    # Step 5: 조건부 배포
    with dsl.If(eval_task.output >= accuracy_threshold):
        deploy_task = deploy_model(
            model_input=train_task.outputs["model_output"],
            accuracy=eval_task.output
        )


@dsl.component(base_image="python:3.11-slim")
def deploy_model(
    model_input: Input[Model],
    accuracy: float
):
    """모델 배포 (조건 충족 시)"""
    print(f"Deploying model with accuracy: {accuracy:.4f}")
    print(f"Model path: {model_input.path}")
    # 실제 배포 로직 (K8s Serving, BentoML 등)
파이프라인 컴파일 및 실행
from kfp import compiler
from kfp.client import Client

# 1. YAML로 컴파일
compiler.Compiler().compile(
    pipeline_func=ml_training_pipeline,
    package_path="ml_pipeline.yaml"
)

# 2. KFP 서버에 제출
client = Client(host="http://localhost:8080")

# Experiment 생성
experiment = client.create_experiment(name="ml-experiments")

# Run 실행
run = client.create_run_from_pipeline_func(
    ml_training_pipeline,
    experiment_name="ml-experiments",
    run_name="training-run-001",
    arguments={
        "dataset_url": "gs://my-bucket/data.csv",
        "n_estimators": 200,
        "max_depth": 8,
        "accuracy_threshold": 0.90
    }
)

print(f"Run ID: {run.run_id}")
print(f"Run URL: http://localhost:8080/#/runs/details/{run.run_id}")
반복 실행 (Recurring Run)
# 매일 새벽 2시에 실행
client.create_recurring_run(
    experiment_id=experiment.experiment_id,
    job_name="daily-retraining",
    pipeline_func=ml_training_pipeline,
    cron_expression="0 2 * * *",
    max_concurrency=1,
    arguments={
        "dataset_url": "gs://my-bucket/latest-data.csv",
        "accuracy_threshold": 0.85
    }
)
고급 패턴
병렬 실행 (ParallelFor)
@dsl.pipeline(name="Hyperparameter Search")
def hp_search_pipeline():
    # 하이퍼파라미터 조합 정의
    hp_configs = [
        {"n_estimators": 100, "max_depth": 4, "lr": 0.1},
        {"n_estimators": 200, "max_depth": 6, "lr": 0.05},
        {"n_estimators": 300, "max_depth": 8, "lr": 0.01},
    ]

    # 병렬 학습
    with dsl.ParallelFor(hp_configs) as config:
        train_task = train_model(
            train_dataset=load_task.outputs["output_dataset"],
            n_estimators=config.n_estimators,
            max_depth=config.max_depth,
            learning_rate=config.lr
        )
캐싱
# 컴포넌트 레벨에서 캐싱 비활성화
load_task = load_data(dataset_url=dataset_url)
load_task.set_caching_options(False)  # 항상 새로 실행

# 파이프라인 레벨에서 캐싱 설정
run = client.create_run_from_pipeline_func(
    ml_training_pipeline,
    enable_caching=True  # 동일 입력이면 캐시 사용
)
볼륨 마운트
@dsl.component(base_image="python:3.11-slim")
def process_large_data(output_data: Output[Dataset]):
    """대용량 데이터 처리"""
    pass

# PVC 마운트
process_task = process_large_data()
process_task.add_pvolumes({
    "/mnt/data": dsl.PipelineVolume(pvc="data-pvc")
})
CI/CD 통합
GitHub Actions + KFP
# .github/workflows/ml-pipeline.yml
name: ML Pipeline CI/CD

on:
  push:
    branches: [main]
    paths:
      - 'pipelines/**'
      - 'components/**'

jobs:
  deploy-pipeline:
    runs-on: ubuntu-latest
    steps:
      - uses: actions/checkout@v4

      - name: Set up Python
        uses: actions/setup-python@v5
        with:
          python-version: '3.11'

      - name: Install dependencies
        run: pip install kfp==2.7.0

      - name: Compile pipeline
        run: python pipelines/compile.py

      - name: Upload and run pipeline
        env:
          KFP_HOST: ${{ secrets.KFP_HOST }}
        run: |
          python -c "
          from kfp.client import Client
          client = Client(host='$KFP_HOST')
          client.upload_pipeline(
            pipeline_package_path='ml_pipeline.yaml',
            pipeline_name='ml-training-v2',
            description='Automated ML training pipeline'
          )
          "
마무리
Kubeflow Pipelines v2 핵심 정리:
- @dsl.component: Python 함수를 컨테이너화된 컴포넌트로 변환
- @dsl.pipeline: 컴포넌트들을 DAG로 연결
- Artifact 시스템: Dataset, Model, Metrics 타입으로 입출력 관리
- 조건/반복: dsl.If, dsl.ParallelFor로 동적 파이프라인
- 캐싱: 동일 입력 시 재실행 방지로 비용 절감
📝 퀴즈 (6문제)
Q1. KFP v2에서 컴포넌트를 정의하는 데코레이터는? @dsl.component
Q2. Output[Dataset]과 Output[Model]의 차이는? 타입 힌트로 아티팩트의 종류를 구분. Dataset은 데이터, Model은 학습된 모델 아티팩트
Q3. 파이프라인에서 조건부 실행을 구현하는 방법은? dsl.If 컨텍스트 매니저 사용 (예: with dsl.If(accuracy >= threshold))
Q4. 캐싱이 활성화된 상태에서 동일한 입력으로 실행하면? 이전 실행 결과를 재사용하여 컴포넌트를 건너뜀
Q5. ParallelFor의 용도는? 동일한 컴포넌트를 다른 파라미터로 병렬 실행 (예: 하이퍼파라미터 서치)
Q6. KFP v1에서 v2로 마이그레이션할 때 가장 큰 변경점은? ContainerOp 대신 @dsl.component 데코레이터 사용, Artifact 타입 시스템 도입
현재 단락 (1/275)
ML 모델을 실험에서 프로덕션으로 옮기는 과정에서 **재현성, 자동화, 버전 관리**는 필수입니다. **Kubeflow Pipelines(KFP) v2**는 Kubernetes 위...