Split View: Kubeflow Pipelines v2 실전 가이드 — KFP SDK로 ML 파이프라인 구축하기
Kubeflow Pipelines v2 실전 가이드 — KFP SDK로 ML 파이프라인 구축하기
들어가며
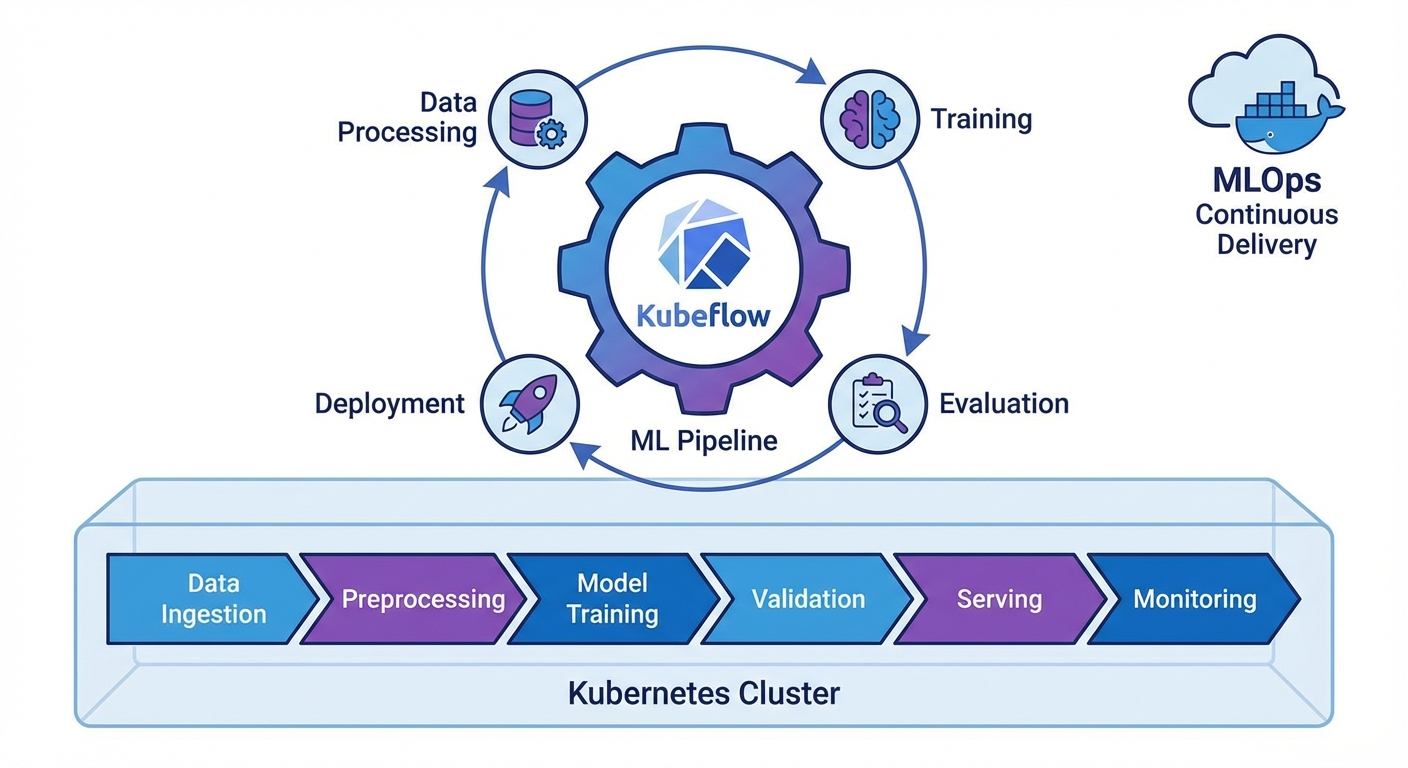
ML 모델을 실험에서 프로덕션으로 옮기는 과정에서 재현성, 자동화, 버전 관리는 필수입니다. Kubeflow Pipelines(KFP) v2는 Kubernetes 위에서 ML 워크플로를 정의하고 실행하는 프레임워크로, 파이썬 데코레이터만으로 파이프라인을 구성할 수 있습니다.
이 글에서는 KFP v2 SDK의 핵심 기능과 실전 파이프라인 구축을 다룹니다.
KFP v2 설치 및 기본 개념
설치
pip install kfp==2.7.0

# Kubeflow Pipelines 백엔드 설치 (Kubernetes)
kubectl apply -k "github.com/kubeflow/pipelines/manifests/kustomize/env/platform-agnostic?ref=2.2.0"

# 포트포워딩
kubectl port-forward svc/ml-pipeline-ui -n kubeflow 8080:80
핵심 개념
# 1. Component: 파이프라인의 단위 작업 (Python 함수)
# 2. Pipeline: Component들의 DAG(방향 비순환 그래프)
# 3. Artifact: 입출력 데이터 (Dataset, Model, Metrics 등)
# 4. Run: 파이프라인의 한 번 실행
# 5. Experiment: Run들의 논리적 그룹
컴포넌트 정의
Lightweight Python Component
from kfp import dsl
from kfp.dsl import (
    Dataset, Input, Output, Model, Metrics,
    ClassificationMetrics, component
)


@dsl.component(
    base_image="python:3.11-slim",
    packages_to_install=["pandas==2.1.4", "scikit-learn==1.4.0"]
)
def load_data(
    dataset_url: str,
    output_dataset: Output[Dataset]
):
    """데이터 로드 컴포넌트"""
    import pandas as pd

    df = pd.read_csv(dataset_url)
    print(f"Loaded {len(df)} rows")

    # Output artifact에 저장
    df.to_csv(output_dataset.path, index=False)
    output_dataset.metadata["num_rows"] = len(df)
    output_dataset.metadata["num_columns"] = len(df.columns)


@dsl.component(
    base_image="python:3.11-slim",
    packages_to_install=["pandas==2.1.4", "scikit-learn==1.4.0"]
)
def preprocess_data(
    input_dataset: Input[Dataset],
    train_dataset: Output[Dataset],
    test_dataset: Output[Dataset],
    test_size: float = 0.2
):
    """데이터 전처리 및 분할"""
    import pandas as pd
    from sklearn.model_selection import train_test_split

    df = pd.read_csv(input_dataset.path)

    # 전처리
    df = df.dropna()
    df = df.drop_duplicates()

    # 분할
    train_df, test_df = train_test_split(df, test_size=test_size, random_state=42)

    train_df.to_csv(train_dataset.path, index=False)
    test_df.to_csv(test_dataset.path, index=False)

    train_dataset.metadata["num_rows"] = len(train_df)
    test_dataset.metadata["num_rows"] = len(test_df)


@dsl.component(
    base_image="python:3.11-slim",
    packages_to_install=[
        "pandas==2.1.4", "scikit-learn==1.4.0",
        "joblib==1.3.2", "xgboost==2.0.3"
    ]
)
def train_model(
    train_dataset: Input[Dataset],
    model_output: Output[Model],
    metrics_output: Output[Metrics],
    n_estimators: int = 100,
    max_depth: int = 6,
    learning_rate: float = 0.1
):
    """모델 학습"""
    import pandas as pd
    import joblib
    from xgboost import XGBClassifier
    from sklearn.model_selection import cross_val_score

    df = pd.read_csv(train_dataset.path)
    X = df.drop("target", axis=1)
    y = df["target"]

    # 학습
    model = XGBClassifier(
        n_estimators=n_estimators,
        max_depth=max_depth,
        learning_rate=learning_rate,
        random_state=42
    )
    model.fit(X, y)

    # 교차 검증
    cv_scores = cross_val_score(model, X, y, cv=5, scoring="accuracy")

    # 모델 저장
    joblib.dump(model, model_output.path)
    model_output.metadata["framework"] = "xgboost"
    model_output.metadata["n_estimators"] = n_estimators

    # 메트릭 기록
    metrics_output.log_metric("cv_accuracy_mean", float(cv_scores.mean()))
    metrics_output.log_metric("cv_accuracy_std", float(cv_scores.std()))
    metrics_output.log_metric("n_estimators", n_estimators)


@dsl.component(
    base_image="python:3.11-slim",
    packages_to_install=[
        "pandas==2.1.4", "scikit-learn==1.4.0",
        "joblib==1.3.2", "xgboost==2.0.3"
    ]
)
def evaluate_model(
    test_dataset: Input[Dataset],
    model_input: Input[Model],
    metrics_output: Output[ClassificationMetrics],
    eval_metrics: Output[Metrics]
) -> float:
    """모델 평가"""
    import pandas as pd
    import joblib
    from sklearn.metrics import accuracy_score, classification_report

    df = pd.read_csv(test_dataset.path)
    X = df.drop("target", axis=1)
    y = df["target"]

    model = joblib.load(model_input.path)
    y_pred = model.predict(X)
    y_prob = model.predict_proba(X)

    accuracy = accuracy_score(y, y_pred)

    # Classification metrics (Confusion Matrix 시각화)
    metrics_output.log_confusion_matrix(
        categories=["Class 0", "Class 1"],
        matrix=[[int(sum((y == 0) & (y_pred == 0))), int(sum((y == 0) & (y_pred == 1)))],
                [int(sum((y == 1) & (y_pred == 0))), int(sum((y == 1) & (y_pred == 1)))]]
    )

    eval_metrics.log_metric("test_accuracy", accuracy)

    return accuracy
커스텀 Docker 이미지 컴포넌트
@dsl.component(
    base_image="pytorch/pytorch:2.1.0-cuda12.1-cudnn8-runtime",
    packages_to_install=["transformers==4.37.0", "datasets==2.16.0"]
)
def finetune_llm(
    model_name: str,
    train_dataset: Input[Dataset],
    output_model: Output[Model],
    epochs: int = 3,
    batch_size: int = 8
):
    """LLM 파인튜닝 (GPU 사용)"""
    from transformers import AutoModelForSequenceClassification, Trainer
    # ... 학습 코드
    pass
파이프라인 작성
기본 파이프라인
@dsl.pipeline(
    name="ML Training Pipeline",
    description="데이터 로드 → 전처리 → 학습 → 평가 파이프라인"
)
def ml_training_pipeline(
    dataset_url: str = "https://example.com/data.csv",
    test_size: float = 0.2,
    n_estimators: int = 100,
    max_depth: int = 6,
    learning_rate: float = 0.1,
    accuracy_threshold: float = 0.85
):
    # Step 1: 데이터 로드
    load_task = load_data(dataset_url=dataset_url)

    # Step 2: 전처리 (load_task 완료 후 실행)
    preprocess_task = preprocess_data(
        input_dataset=load_task.outputs["output_dataset"],
        test_size=test_size
    )

    # Step 3: 모델 학습
    train_task = train_model(
        train_dataset=preprocess_task.outputs["train_dataset"],
        n_estimators=n_estimators,
        max_depth=max_depth,
        learning_rate=learning_rate
    )
    # GPU 리소스 설정
    train_task.set_cpu_limit("4")
    train_task.set_memory_limit("8Gi")

    # Step 4: 평가
    eval_task = evaluate_model(
        test_dataset=preprocess_task.outputs["test_dataset"],
        model_input=train_task.outputs["model_output"]
    )

    # Step 5: 조건부 배포
    with dsl.If(eval_task.output >= accuracy_threshold):
        deploy_task = deploy_model(
            model_input=train_task.outputs["model_output"],
            accuracy=eval_task.output
        )


@dsl.component(base_image="python:3.11-slim")
def deploy_model(
    model_input: Input[Model],
    accuracy: float
):
    """모델 배포 (조건 충족 시)"""
    print(f"Deploying model with accuracy: {accuracy:.4f}")
    print(f"Model path: {model_input.path}")
    # 실제 배포 로직 (K8s Serving, BentoML 등)
파이프라인 컴파일 및 실행
from kfp import compiler
from kfp.client import Client

# 1. YAML로 컴파일
compiler.Compiler().compile(
    pipeline_func=ml_training_pipeline,
    package_path="ml_pipeline.yaml"
)

# 2. KFP 서버에 제출
client = Client(host="http://localhost:8080")

# Experiment 생성
experiment = client.create_experiment(name="ml-experiments")

# Run 실행
run = client.create_run_from_pipeline_func(
    ml_training_pipeline,
    experiment_name="ml-experiments",
    run_name="training-run-001",
    arguments={
        "dataset_url": "gs://my-bucket/data.csv",
        "n_estimators": 200,
        "max_depth": 8,
        "accuracy_threshold": 0.90
    }
)

print(f"Run ID: {run.run_id}")
print(f"Run URL: http://localhost:8080/#/runs/details/{run.run_id}")
반복 실행 (Recurring Run)
# 매일 새벽 2시에 실행
client.create_recurring_run(
    experiment_id=experiment.experiment_id,
    job_name="daily-retraining",
    pipeline_func=ml_training_pipeline,
    cron_expression="0 2 * * *",
    max_concurrency=1,
    arguments={
        "dataset_url": "gs://my-bucket/latest-data.csv",
        "accuracy_threshold": 0.85
    }
)
고급 패턴
병렬 실행 (ParallelFor)
@dsl.pipeline(name="Hyperparameter Search")
def hp_search_pipeline():
    # 하이퍼파라미터 조합 정의
    hp_configs = [
        {"n_estimators": 100, "max_depth": 4, "lr": 0.1},
        {"n_estimators": 200, "max_depth": 6, "lr": 0.05},
        {"n_estimators": 300, "max_depth": 8, "lr": 0.01},
    ]

    # 병렬 학습
    with dsl.ParallelFor(hp_configs) as config:
        train_task = train_model(
            train_dataset=load_task.outputs["output_dataset"],
            n_estimators=config.n_estimators,
            max_depth=config.max_depth,
            learning_rate=config.lr
        )
캐싱
# 컴포넌트 레벨에서 캐싱 비활성화
load_task = load_data(dataset_url=dataset_url)
load_task.set_caching_options(False)  # 항상 새로 실행

# 파이프라인 레벨에서 캐싱 설정
run = client.create_run_from_pipeline_func(
    ml_training_pipeline,
    enable_caching=True  # 동일 입력이면 캐시 사용
)
볼륨 마운트
@dsl.component(base_image="python:3.11-slim")
def process_large_data(output_data: Output[Dataset]):
    """대용량 데이터 처리"""
    pass

# PVC 마운트
process_task = process_large_data()
process_task.add_pvolumes({
    "/mnt/data": dsl.PipelineVolume(pvc="data-pvc")
})
CI/CD 통합
GitHub Actions + KFP
# .github/workflows/ml-pipeline.yml
name: ML Pipeline CI/CD

on:
  push:
    branches: [main]
    paths:
      - 'pipelines/**'
      - 'components/**'

jobs:
  deploy-pipeline:
    runs-on: ubuntu-latest
    steps:
      - uses: actions/checkout@v4

      - name: Set up Python
        uses: actions/setup-python@v5
        with:
          python-version: '3.11'

      - name: Install dependencies
        run: pip install kfp==2.7.0

      - name: Compile pipeline
        run: python pipelines/compile.py

      - name: Upload and run pipeline
        env:
          KFP_HOST: ${{ secrets.KFP_HOST }}
        run: |
          python -c "
          from kfp.client import Client
          client = Client(host='$KFP_HOST')
          client.upload_pipeline(
            pipeline_package_path='ml_pipeline.yaml',
            pipeline_name='ml-training-v2',
            description='Automated ML training pipeline'
          )
          "
마무리
Kubeflow Pipelines v2 핵심 정리:
- @dsl.component: Python 함수를 컨테이너화된 컴포넌트로 변환
- @dsl.pipeline: 컴포넌트들을 DAG로 연결
- Artifact 시스템: Dataset, Model, Metrics 타입으로 입출력 관리
- 조건/반복: dsl.If, dsl.ParallelFor로 동적 파이프라인
- 캐싱: 동일 입력 시 재실행 방지로 비용 절감
📝 퀴즈 (6문제)
Q1. KFP v2에서 컴포넌트를 정의하는 데코레이터는? @dsl.component
Q2. Output[Dataset]과 Output[Model]의 차이는? 타입 힌트로 아티팩트의 종류를 구분. Dataset은 데이터, Model은 학습된 모델 아티팩트
Q3. 파이프라인에서 조건부 실행을 구현하는 방법은? dsl.If 컨텍스트 매니저 사용 (예: with dsl.If(accuracy >= threshold))
Q4. 캐싱이 활성화된 상태에서 동일한 입력으로 실행하면? 이전 실행 결과를 재사용하여 컴포넌트를 건너뜀
Q5. ParallelFor의 용도는? 동일한 컴포넌트를 다른 파라미터로 병렬 실행 (예: 하이퍼파라미터 서치)
Q6. KFP v1에서 v2로 마이그레이션할 때 가장 큰 변경점은? ContainerOp 대신 @dsl.component 데코레이터 사용, Artifact 타입 시스템 도입
Kubeflow Pipelines v2 Practical Guide — Building ML Pipelines with KFP SDK
- Introduction
- KFP v2 Installation and Core Concepts
- Defining Components
- Authoring Pipelines
- Advanced Patterns
- CI/CD Integration
- Conclusion
- Quiz
Introduction
When moving ML models from experimentation to production, reproducibility, automation, and version management are essential. Kubeflow Pipelines (KFP) v2 is a framework for defining and running ML workflows on Kubernetes, allowing you to compose pipelines using nothing but Python decorators.
This article covers the core features of the KFP v2 SDK and hands-on pipeline construction.
KFP v2 Installation and Core Concepts
Installation
pip install kfp==2.7.0

# Install Kubeflow Pipelines backend (Kubernetes)
kubectl apply -k "github.com/kubeflow/pipelines/manifests/kustomize/env/platform-agnostic?ref=2.2.0"

# Port forwarding
kubectl port-forward svc/ml-pipeline-ui -n kubeflow 8080:80
Core Concepts
# 1. Component: A unit of work in the pipeline (Python function)
# 2. Pipeline: A DAG (Directed Acyclic Graph) of Components
# 3. Artifact: Input/output data (Dataset, Model, Metrics, etc.)
# 4. Run: A single execution of a pipeline
# 5. Experiment: A logical group of Runs
Defining Components
Lightweight Python Component
from kfp import dsl
from kfp.dsl import (
    Dataset, Input, Output, Model, Metrics,
    ClassificationMetrics, component
)


@dsl.component(
    base_image="python:3.11-slim",
    packages_to_install=["pandas==2.1.4", "scikit-learn==1.4.0"]
)
def load_data(
    dataset_url: str,
    output_dataset: Output[Dataset]
):
    """Data loading component"""
    import pandas as pd

    df = pd.read_csv(dataset_url)
    print(f"Loaded {len(df)} rows")

    # Save to output artifact
    df.to_csv(output_dataset.path, index=False)
    output_dataset.metadata["num_rows"] = len(df)
    output_dataset.metadata["num_columns"] = len(df.columns)


@dsl.component(
    base_image="python:3.11-slim",
    packages_to_install=["pandas==2.1.4", "scikit-learn==1.4.0"]
)
def preprocess_data(
    input_dataset: Input[Dataset],
    train_dataset: Output[Dataset],
    test_dataset: Output[Dataset],
    test_size: float = 0.2
):
    """Data preprocessing and splitting"""
    import pandas as pd
    from sklearn.model_selection import train_test_split

    df = pd.read_csv(input_dataset.path)

    # Preprocessing
    df = df.dropna()
    df = df.drop_duplicates()

    # Splitting
    train_df, test_df = train_test_split(df, test_size=test_size, random_state=42)

    train_df.to_csv(train_dataset.path, index=False)
    test_df.to_csv(test_dataset.path, index=False)

    train_dataset.metadata["num_rows"] = len(train_df)
    test_dataset.metadata["num_rows"] = len(test_df)


@dsl.component(
    base_image="python:3.11-slim",
    packages_to_install=[
        "pandas==2.1.4", "scikit-learn==1.4.0",
        "joblib==1.3.2", "xgboost==2.0.3"
    ]
)
def train_model(
    train_dataset: Input[Dataset],
    model_output: Output[Model],
    metrics_output: Output[Metrics],
    n_estimators: int = 100,
    max_depth: int = 6,
    learning_rate: float = 0.1
):
    """Model training"""
    import pandas as pd
    import joblib
    from xgboost import XGBClassifier
    from sklearn.model_selection import cross_val_score

    df = pd.read_csv(train_dataset.path)
    X = df.drop("target", axis=1)
    y = df["target"]

    # Training
    model = XGBClassifier(
        n_estimators=n_estimators,
        max_depth=max_depth,
        learning_rate=learning_rate,
        random_state=42
    )
    model.fit(X, y)

    # Cross-validation
    cv_scores = cross_val_score(model, X, y, cv=5, scoring="accuracy")

    # Save model
    joblib.dump(model, model_output.path)
    model_output.metadata["framework"] = "xgboost"
    model_output.metadata["n_estimators"] = n_estimators

    # Log metrics
    metrics_output.log_metric("cv_accuracy_mean", float(cv_scores.mean()))
    metrics_output.log_metric("cv_accuracy_std", float(cv_scores.std()))
    metrics_output.log_metric("n_estimators", n_estimators)


@dsl.component(
    base_image="python:3.11-slim",
    packages_to_install=[
        "pandas==2.1.4", "scikit-learn==1.4.0",
        "joblib==1.3.2", "xgboost==2.0.3"
    ]
)
def evaluate_model(
    test_dataset: Input[Dataset],
    model_input: Input[Model],
    metrics_output: Output[ClassificationMetrics],
    eval_metrics: Output[Metrics]
) -> float:
    """Model evaluation"""
    import pandas as pd
    import joblib
    from sklearn.metrics import accuracy_score, classification_report

    df = pd.read_csv(test_dataset.path)
    X = df.drop("target", axis=1)
    y = df["target"]

    model = joblib.load(model_input.path)
    y_pred = model.predict(X)
    y_prob = model.predict_proba(X)

    accuracy = accuracy_score(y, y_pred)

    # Classification metrics (Confusion Matrix visualization)
    metrics_output.log_confusion_matrix(
        categories=["Class 0", "Class 1"],
        matrix=[[int(sum((y == 0) & (y_pred == 0))), int(sum((y == 0) & (y_pred == 1)))],
                [int(sum((y == 1) & (y_pred == 0))), int(sum((y == 1) & (y_pred == 1)))]]
    )

    eval_metrics.log_metric("test_accuracy", accuracy)

    return accuracy
Custom Docker Image Component
@dsl.component(
    base_image="pytorch/pytorch:2.1.0-cuda12.1-cudnn8-runtime",
    packages_to_install=["transformers==4.37.0", "datasets==2.16.0"]
)
def finetune_llm(
    model_name: str,
    train_dataset: Input[Dataset],
    output_model: Output[Model],
    epochs: int = 3,
    batch_size: int = 8
):
    """LLM fine-tuning (GPU required)"""
    from transformers import AutoModelForSequenceClassification, Trainer
    # ... training code
    pass
Authoring Pipelines
Basic Pipeline
@dsl.pipeline(
    name="ML Training Pipeline",
    description="Data Load -> Preprocess -> Train -> Evaluate Pipeline"
)
def ml_training_pipeline(
    dataset_url: str = "https://example.com/data.csv",
    test_size: float = 0.2,
    n_estimators: int = 100,
    max_depth: int = 6,
    learning_rate: float = 0.1,
    accuracy_threshold: float = 0.85
):
    # Step 1: Load data
    load_task = load_data(dataset_url=dataset_url)

    # Step 2: Preprocess (runs after load_task completes)
    preprocess_task = preprocess_data(
        input_dataset=load_task.outputs["output_dataset"],
        test_size=test_size
    )

    # Step 3: Train model
    train_task = train_model(
        train_dataset=preprocess_task.outputs["train_dataset"],
        n_estimators=n_estimators,
        max_depth=max_depth,
        learning_rate=learning_rate
    )
    # Set resource limits
    train_task.set_cpu_limit("4")
    train_task.set_memory_limit("8Gi")

    # Step 4: Evaluate
    eval_task = evaluate_model(
        test_dataset=preprocess_task.outputs["test_dataset"],
        model_input=train_task.outputs["model_output"]
    )

    # Step 5: Conditional deployment
    with dsl.If(eval_task.output >= accuracy_threshold):
        deploy_task = deploy_model(
            model_input=train_task.outputs["model_output"],
            accuracy=eval_task.output
        )


@dsl.component(base_image="python:3.11-slim")
def deploy_model(
    model_input: Input[Model],
    accuracy: float
):
    """Deploy model (when conditions are met)"""
    print(f"Deploying model with accuracy: {accuracy:.4f}")
    print(f"Model path: {model_input.path}")
    # Actual deployment logic (K8s Serving, BentoML, etc.)
Pipeline Compilation and Execution
from kfp import compiler
from kfp.client import Client

# 1. Compile to YAML
compiler.Compiler().compile(
    pipeline_func=ml_training_pipeline,
    package_path="ml_pipeline.yaml"
)

# 2. Submit to KFP server
client = Client(host="http://localhost:8080")

# Create Experiment
experiment = client.create_experiment(name="ml-experiments")

# Execute Run
run = client.create_run_from_pipeline_func(
    ml_training_pipeline,
    experiment_name="ml-experiments",
    run_name="training-run-001",
    arguments={
        "dataset_url": "gs://my-bucket/data.csv",
        "n_estimators": 200,
        "max_depth": 8,
        "accuracy_threshold": 0.90
    }
)

print(f"Run ID: {run.run_id}")
print(f"Run URL: http://localhost:8080/#/runs/details/{run.run_id}")
Recurring Run
# Run daily at 2 AM
client.create_recurring_run(
    experiment_id=experiment.experiment_id,
    job_name="daily-retraining",
    pipeline_func=ml_training_pipeline,
    cron_expression="0 2 * * *",
    max_concurrency=1,
    arguments={
        "dataset_url": "gs://my-bucket/latest-data.csv",
        "accuracy_threshold": 0.85
    }
)
Advanced Patterns
Parallel Execution (ParallelFor)
@dsl.pipeline(name="Hyperparameter Search")
def hp_search_pipeline():
    # Define hyperparameter combinations
    hp_configs = [
        {"n_estimators": 100, "max_depth": 4, "lr": 0.1},
        {"n_estimators": 200, "max_depth": 6, "lr": 0.05},
        {"n_estimators": 300, "max_depth": 8, "lr": 0.01},
    ]

    # Parallel training
    with dsl.ParallelFor(hp_configs) as config:
        train_task = train_model(
            train_dataset=load_task.outputs["output_dataset"],
            n_estimators=config.n_estimators,
            max_depth=config.max_depth,
            learning_rate=config.lr
        )
Caching
# Disable caching at the component level
load_task = load_data(dataset_url=dataset_url)
load_task.set_caching_options(False)  # Always re-execute

# Configure caching at the pipeline level
run = client.create_run_from_pipeline_func(
    ml_training_pipeline,
    enable_caching=True  # Use cache for identical inputs
)
Volume Mounts
@dsl.component(base_image="python:3.11-slim")
def process_large_data(output_data: Output[Dataset]):
    """Process large datasets"""
    pass

# PVC mount
process_task = process_large_data()
process_task.add_pvolumes({
    "/mnt/data": dsl.PipelineVolume(pvc="data-pvc")
})
CI/CD Integration
GitHub Actions + KFP
# .github/workflows/ml-pipeline.yml
name: ML Pipeline CI/CD

on:
  push:
    branches: [main]
    paths:
      - 'pipelines/**'
      - 'components/**'

jobs:
  deploy-pipeline:
    runs-on: ubuntu-latest
    steps:
      - uses: actions/checkout@v4

      - name: Set up Python
        uses: actions/setup-python@v5
        with:
          python-version: '3.11'

      - name: Install dependencies
        run: pip install kfp==2.7.0

      - name: Compile pipeline
        run: python pipelines/compile.py

      - name: Upload and run pipeline
        env:
          KFP_HOST: ${{ secrets.KFP_HOST }}
        run: |
          python -c "
          from kfp.client import Client
          client = Client(host='$KFP_HOST')
          client.upload_pipeline(
            pipeline_package_path='ml_pipeline.yaml',
            pipeline_name='ml-training-v2',
            description='Automated ML training pipeline'
          )
          "
Conclusion
Kubeflow Pipelines v2 key takeaways:
- @dsl.component: Converts Python functions into containerized components
- @dsl.pipeline: Connects components into a DAG
- Artifact System: Manages inputs/outputs with typed artifacts like Dataset, Model, and Metrics
- Conditionals/Loops: Dynamic pipelines with dsl.If and dsl.ParallelFor
- Caching: Cost reduction by skipping re-execution for identical inputs
Quiz (6 Questions)
Q1. What is the decorator used to define a component in KFP v2? @dsl.component
Q2. What is the difference between Output[Dataset] and Output[Model]? They are type hints that distinguish artifact types. Dataset is for data artifacts, and Model is for trained model artifacts.
Q3. How do you implement conditional execution in a pipeline? Use the dsl.If context manager (e.g., with dsl.If(accuracy >= threshold))
Q4. What happens when you run with identical inputs while caching is enabled? The component is skipped and the previous execution results are reused.
Q5. What is ParallelFor used for? Running the same component in parallel with different parameters (e.g., hyperparameter search)
Q6. What is the biggest change when migrating from KFP v1 to v2? Using @dsl.component decorator instead of ContainerOp, and the introduction of the Artifact type system.
Quiz
Q1: What is the main topic covered in "Kubeflow Pipelines v2 Practical Guide — Building ML
Pipelines with KFP SDK"?
A practical guide to building ML pipelines with the KFP SDK in Kubeflow Pipelines v2. Covers component definitions, pipeline authoring, artifact management, and Kubernetes deployment with a code-first approach.
Q2: What are the key steps for KFP v2 Installation and Core Concepts?
Installation Core Concepts
Q3: Explain the core concept of Defining Components.
Lightweight Python Component Custom Docker Image Component
Q4: What are the key aspects of Authoring Pipelines?
Basic Pipeline Pipeline Compilation and Execution Recurring Run
Q5: How does Advanced Patterns work?
Parallel Execution (ParallelFor) Caching Volume Mounts