- Authors

- Name
- Youngju Kim
- @fjvbn20031
Let's build a web application with an MVC structure using Spring Boot. In the past (during the JSP era), there was a time when all logic was handled in the View without separating M (Model), V (View), and C (Controller). While this structure might be fine for simple pages, for complex web applications, a single webpage file written in JSP syntax could easily exceed thousands of lines, making feature additions and maintenance increasingly difficult over time. This is why modern development uses the MVC pattern, which separates the View and Controller, rather than the older Model1 (MV) structure.
In this post, we will add a hello-mvc controller to the project we created in the previous post Creating a Simple Spring Boot Application and explore how the MVC structure is implemented in Spring Boot.
Hello Web Page
Modifying Hello Controller
Define a helloMvc function in HelloController.java as shown below. When the controller returns the string hello-template, Spring's viewResolver finds the matching template among the template files.
    @GetMapping("hello-mvc")
    public String helloMvc(@RequestParam("name") String name, Model model){
        model.addAttribute("name", name);
        return "hello-template";
    }
Modifying hello-template.html
Create a hello-template.html file with the following content.
<!DOCTYPE html>
<html xmlns:th="http://www.thymeleaf.org">
<head>
    <meta charset="UTF-8">
    <title>Hello template</title>
</head>
<body>
<p th:text="'hello ' + ${name}" >hello! empty</p>
</body>
</html>
Verifying the hello-mvc Web Page
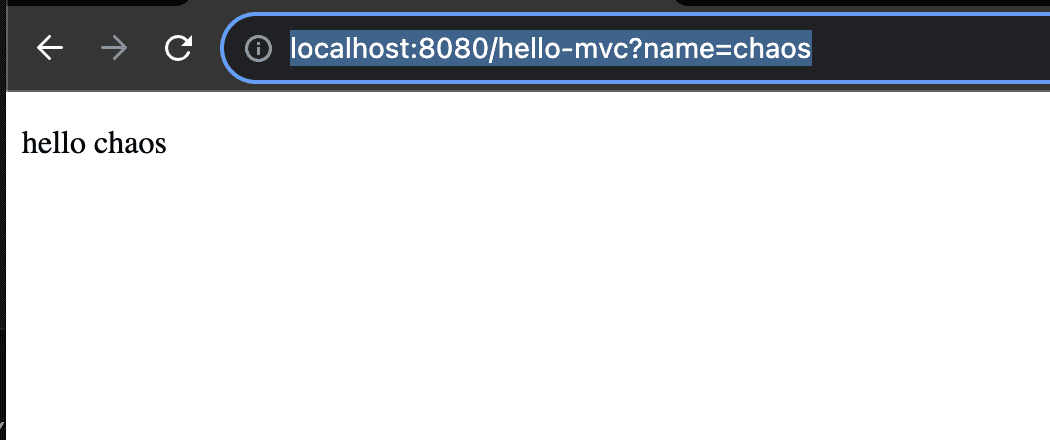
After restarting Spring, access the hello-mvc URL after localhost:8080 and pass 'chaos' as the 'name' parameter (e.g., http://localhost:8080/hello-mvc?name=chaos). The Controller passes this information to the view, and you can see hello chaos displayed as expected below. If you press F12 in Chrome to inspect the page source, you can confirm that the HTML has been properly generated.
Hello API
Modifying Hello Controller
There are situations where you need to return an HTML file, but what about cases where you only need to provide an API that returns JSON data instead of HTML?
Define a Hello object in HelloController.java as shown below.
        static class Hello{
        private String name;

        public String getName() {
            return name;
        }

        public void setName(String name) {
            this.name = name;
        }
    }
Then define the helloApi function as shown below. Previously we returned a string, but this time we return an object. Since we added the @ResponseBody annotation and returned an object instead of a string, the HttpMessageConverter and its internal JsonConverter (MappingJackson2HttpMessageConverter) are invoked instead of the viewResolver. This way, the object is serialized as JSON in the HTTP body and returned to the user.
    @GetMapping("hello-api")
    @ResponseBody
    public Hello helloApi(@RequestParam("name") String name){
        Hello hello = new Hello();
        hello.setName(name);
        return hello;
    }
Verifying hello-api
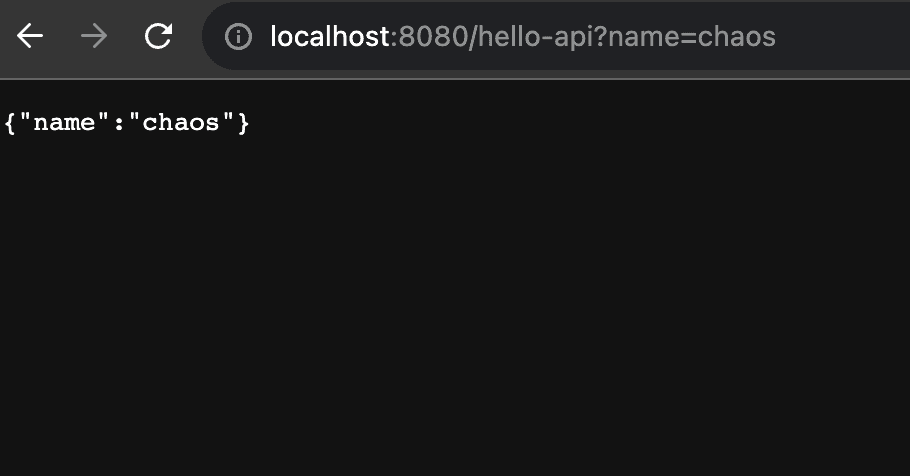
Access the hello-api URL after localhost:8080 and pass 'chaos' as the 'name' parameter. This time, you can confirm that the data is returned in JSON format rather than HTML format.
References
- Kim Young-han's Inflearn course: Spring Introduction - Spring Boot