- Authors

- Name
- Youngju Kim
- @fjvbn20031
Steps
Create a Project on spring.io
Go to start.spring.io and configure the Java version, project management tool, Boot version, and dependencies, then click the Generate button to download the project files.
I selected Gradle-Groovy, Java, Boot 2.7.15, Java 11, spring-starter-web, and thymeleaf as shown below.

Run the Project in IntelliJ
Extract the zip file downloaded by clicking the Generate button, launch IntelliJ, and open the corresponding folder.
Create HelloController.java
Create a new package called Controller and create a HelloController.java file with the following content. The @Controller annotation tells Spring to manage this class as a Controller, and @GetMapping("hello") maps GET requests with the "hello" URL suffix to the hello function.
package hello.hellospring.controller;

import org.springframework.stereotype.Controller;
import org.springframework.ui.Model;
import org.springframework.web.bind.annotation.GetMapping;

@Controller
public class HelloController{
    @GetMapping("hello")
    public String hello(Model model){
        model.addAttribute("data", "hello!!");
        return "hello";
    }
}
Create hello.html
Since we will be using the ThymeLeaf template engine to display content in the web browser, create a hello.html file under the resources then templates folder. Write the code to display the data passed through the Controller's model on the screen, following the thymeleaf syntax.
<!DOCTYPE html>
<html xmlns:th="http://www.thymeleaf.org">
<head>
    <meta charset="UTF-8">
    <title>Hello</title>
</head>
<body>
  <p th:text="'안녕하세요. ' + ${data}" >안녕하세요. 손님</p>
</body>
</html>
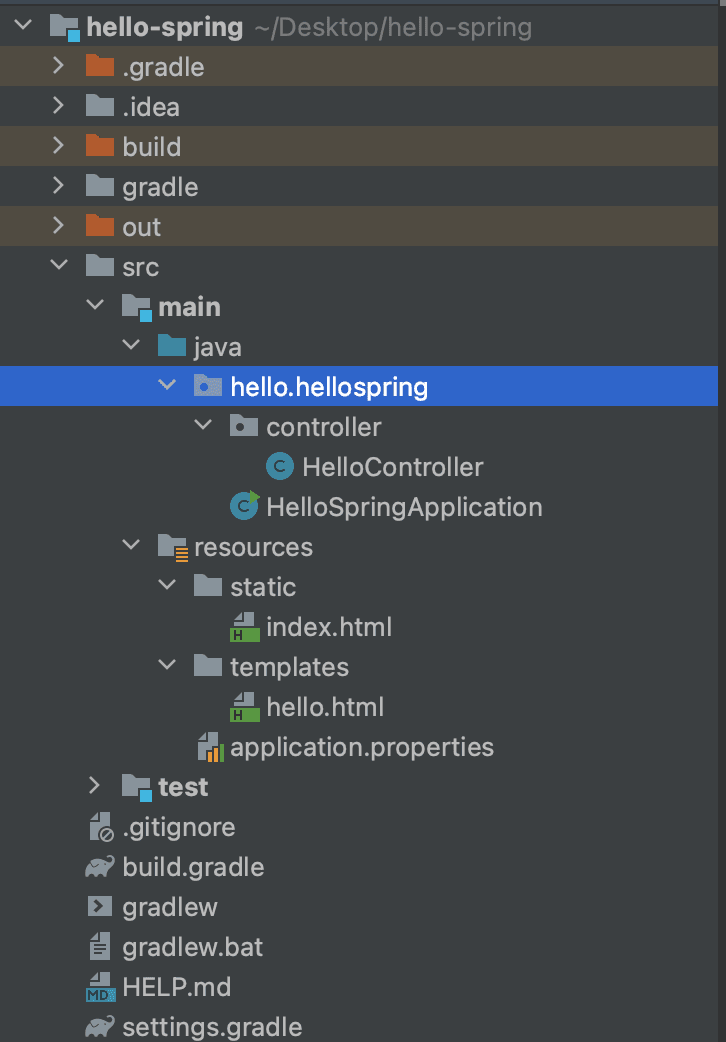
After creating the two files HelloController.java and hello.html, the project source tree looks like this:
Running Spring Boot
The main function, which is the entry point of the Spring Boot server, exists in HelloSpringApplication. When you hover your mouse over it, a run button appears -- click this button to start the Spring Web Server.
If you see a log message like the one below indicating that the Tomcat server has started successfully on port 8080, everything is working correctly.
2023-09-03 10:14:44.512  INFO 53925 --- [           main] o.s.b.w.embedded.tomcat.TomcatWebServer  : Tomcat initialized with port(s): 8080 (http)
2023-09-03 10:14:44.519  INFO 53925 --- [           main] o.apache.catalina.core.StandardService   : Starting service [Tomcat]
2023-09-03 10:14:44.519  INFO 53925 --- [           main] org.apache.catalina.core.StandardEngine  : Starting Servlet engine: [Apache Tomcat/9.0.79]
2023-09-03 10:14:44.563  INFO 53925 --- [           main] o.a.c.c.C.[Tomcat].[localhost].[/]       : Initializing Spring embedded WebApplicationContext
2023-09-03 10:14:44.564  INFO 53925 --- [           main] w.s.c.ServletWebServerApplicationContext : Root WebApplicationContext: initialization completed in 478 ms
2023-09-03 10:14:44.663  INFO 53925 --- [           main] o.s.b.a.w.s.WelcomePageHandlerMapping    : Adding welcome page: class path resource [static/index.html]
2023-09-03 10:14:44.752  INFO 53925 --- [           main] o.s.b.w.embedded.tomcat.TomcatWebServer  : Tomcat started on port(s): 8080 (http) with context path ''
2023-09-03 10:14:44.759  INFO 53925 --- [           main] h.hellospring.HelloSpringApplication     : Started HelloSpringApplication in 0.909 seconds (JVM running for 1.099)
As shown below, if you navigate to http://localhost:8080/hello in your web browser, you can see the hello message displayed.

Building and Running with Gradle
Without using IntelliJ, you can also build and run the Spring Boot Application from the terminal using the following commands.
$./gradlew clean build
$ cd build/libs
$ java -jar hello-spring-0.0.1-SNAPSHOT.jar
Spring is a truly massive framework, and in the past, when Tomcat was not embedded, development was much more challenging. Nowadays, thanks to Spring Boot, we can build web applications this easily. However, as the level of abstraction has increased, developers rarely need to touch Spring core directly, which raises the concern that they may use it without understanding its underlying principles. When this happens, it becomes difficult to identify root causes when issues arise. While we use Spring Boot for fast and productive Spring development, we should always keep an eye on what is happening inside Spring as well.
References
- Kim Young-han's Inflearn course: Spring Introduction - Spring Boot